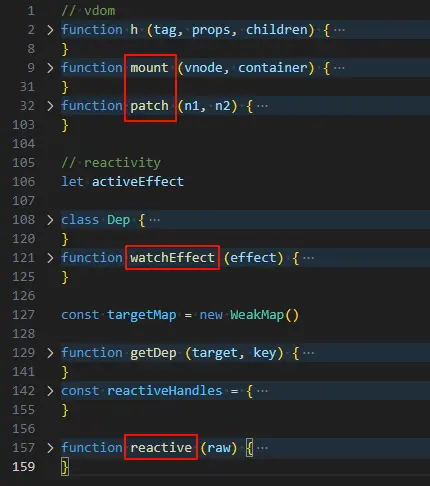
虚拟dom
虚拟dom(Virtual Dom) 作用:让组件的渲染逻辑完全从真实Dom解耦,在其他环境下重用框架的运行时,比如:在 iOS 和 Android 创建自定义渲染的解决方案,也可以使用API创建自定义渲染器直接渲染到WebGL(而不是Dom节点)
当template模板语法遇到一些限制时(通常情况下不会,只有很少情况比如开发库的时候),使用Virtual Dom更完整使用JavaScript的能力提供了以编程方式构造,检查,克隆以及操作所需的Dom结构
在Vue2中 render函数长这样
render(h){
    return h('div',{
        attrs:{
            id: 'foo'
    },
    on: {
      click: this.onClick
    }
  }, 'hello')
}
你完全可以使用render来替代template来为组件提供一个渲染函数(但大部分情况下template更简单易用),这里返回一个vnode虚拟Dom,第一个参数是type类型,第二个类型是对象传入属性(props),第三个参数表示子节点,可以是字符串、数组、null、function (vue内部做了处理,也可以只传两个参数,vue会根据类型判断是对象就传入属性,其他的传入子节点)
Vue3 render
import { h } from 'vue'
render() {
  return h('div', {
    id: 'foo',
    onClick: this.onClick
  }, 'hello')
}
vue3中 h从vue中导出使用而不是render传入,属性和点击事件也更加扁平化了
<body>
  <div id="app"></div>
  <script src="https://unpkg.com/vue"></script>
  <script>
    const { h, createApp } = Vue
    const App = {
      render () {
        return h('div', {
          id: 'hello'
        }, [h('span', 'world')])
      }
    }
    createApp(App).mount('#app')
  </script>
</body>

</html>

如果是使用v-if,可以看到加了一个三元表达式判断

当上下文的ok是true时,正常渲染,false时使用 document.createComment 渲染一个占位符
<!--v-if-->
静态类型提升和函数缓存
当你打开这个这两个选项的时候,你就可以看到静态标签被提出去了,并且onClick点击事件也使用数组缓存了,都是为了进一步提升diff时的效率,跳过哪些不需要比对的,避免了每次渲染时,会创建一个新的内联函数导致子组件重新渲染 (这也是为什么React有 useMemo和useCallback),在vue中template转render过程中就能自动帮你缓存

实现一个最简单的虚拟dom转真实dom
首先要有一个能描述dom结构的一个vdom变量,接着要有一个div让我们把需要添加的元素加到这个div上
const vdom = h('div', { class: 'red' }, [
  h('span', null, 'hello world')
])

mount(vdom, document.getElementById('app'))
接着就来实现h函数和mount函数,h函数很简单就传入什么,返回一个对象就行了
function h (tag, props, children) {
  return {
    tag,
    props,
    children
  }
}
接着就是mount函数,就要首先把vnode上面的所有props遍历出来,(正常情况下需要考虑它是property、attribute还是一个点击事件,这里只简单处理attribute情况),然后遍历children,把每一项添加进去
function mount (vnode, container) {
  const el = document.createElement(vnode.tag)
  if (vnode.props) {
    for (const key in vnode.props) {
      const value = vnode.props[key]
      el.setAttribute(key, value)
    }
  }
  if (vnode.children) {
    if (typeof vnode.children === 'string') {
      el.textContent = vnode.children
    } else {
      // 如果子组件是个数组就需要遍历
      vnode.children.forEach(child => {
        if (typeof child === 'string') {
          el.appendChild(document.createTextNode(child))
        } else {
          // 如果子组件里面是个h('div', null, 'hi')就递归 加载到这个组件上
          mount(child, el)
        }
      })
    }
  }
  container.appendChild(el)
}
这样就完成了一个简单的渲染vnode成真实dom,完整代码如下
<!DOCTYPE html>
<html lang="en">

<head>
  <meta charset="UTF-8">
  <meta name="viewport" content="width=device-width, initial-scale=1.0">
  <title>Document</title>
  <style>
    .red {
      color: red;
    }
  </style>
</head>

<body>
  <div id="app"></div>
  <script src="https://unpkg.com/vue"></script>
  <script>
    function h (tag, props, children) {
      return {
        tag,
        props,
        children
      }
    }
    function mount (vnode, container) {
      const el = document.createElement(vnode.tag)
      if (vnode.props) {
        for (const key in vnode.props) {
          const value = vnode.props[key]
          el.setAttribute(key, value)
        }
      }
      if (vnode.children) {
        if (typeof vnode.children === 'string') {
          el.textContent = vnode.children
        } else {
          vnode.children.forEach(child => {
            if (typeof child === 'string') {
              el.appendChild(document.createTextNode(child))
            } else {
              mount(child, el)
            }
          })
        }
      }
      container.appendChild(el)
    }
    const vdom = h('div', { class: 'red' }, [
      h('span', null, 'hello world')
    ])
    mount(vdom, document.getElementById('app'))
  </script>
</body>

</html>
